The HomePod is an AI assistant from Apple, much like the Amazon Echo and Google Home. It is much more expensive than its competitors, and for a good reason. It has many features, including a better speaker and microphone.
Since this is a smart speaker, it needs an internet connection to function. But you may have faced some issues when connecting to the same Wi-Fi network or changing Wi-Fi networks.
We will talk about how to connect your HomePod to Wi-Fi and all the commonly encountered errors when setting up a HomePod or HomePodmini, whether they are about network connectivity, software updates, or any other bug. Let’s begin!
How to Connect HomePod to A Public Network?

- Compatible with major cable internet providers including Xfinity, Spectrum, Cox and more. NOT compatible...
- [Compatibility] 12V Power Supply Adapter Compatible with Netgear, Linksys, Asus,Motorola, Motorola/Arris...
HomePod speakers do not have a keyboard, so you cannot manually connect them to a Wi-Fi network by entering a username and password. Such devices can be connected to a Wi-Fi network by using their MAC address.
Connecting through a username and a password is especially problematic in hotels, college dorms, or offices. But, many of these places have portals that allow you to enter the MAC address of your HomePod manually to access the new Wi-Fi network.
Once you have the MAC address of the HomePod, enter it on the portal to register it as a new device. Then, reset the HomePod, and it will automatically connect to the said network.
How to Get the MAC Address of Your HomePod?
The Media Access Control address is a unique identity given to each Apple device by the manufacturer. Any network interface will use this address to recognize your device.
Once you have the MAC address, you can easily connect your HomePod to a different Wi-Fi network. But this is where another problem may come up. The MAC address of your HomePod is not listed on the box.
Follow the methods listed below to find the MAC address:
Through the Home App
The simplest way to get the MAC address of your HomePod is by checking the home app. But this is only possible if you had your HomePod connected to a home network before changing to a different Wi-Fi network.
If so, then this is how you can find the MAC address:
- Go to the Home app and make sure you have selected your device.
- Scroll down and tap “Settings.”
- In settings, scroll to the bottom, and you will find the “Wi-Fi Address.” If you see “Wi-Fi Network,” tap on it, and the address will appear.
- The 12 alpha-numeric figures will be the MAC address of your HomePod.
Through An iOS Device
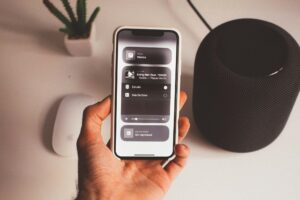
For this method, you must have an iOS device such as an iPhone or an iPad. You will also need a device that has a Wi-Fi hotspot.
Follow these steps to find the MAC address:
Step 1- Connect Your iOS Device
Turn on the hotspot on another iOS or Android device and connect your iOS device to that network.
Step 2- Connect HomePod to Hotspot
To connect the HomePod to the hotspot, you need to bring the HomePod within the range of your iOS device.
If you do not see HomePod appear on your phone, go ahead and reset it. The right order of steps on how to reset it is:
- Unplug the HomePod from the wall for 10 seconds and replug it.
- Long press on the HomePod button in the middle for a few seconds until the light turns red and you hear Siri say that the HomePod is going to reset.
- Keep holding the button until the HomePod stops resetting and boots on. Once it’s done, the center button will light up with a sound.
This is how you factory reset the HomePod manually. Once it turns back on, it should complete pairing with your iOS device.
Step 3- Find HomePod in Connected Devices
On your iOS device, you will see the HomePod listed as a connected device. Click on it to see its MAC address displayed along with other details of the device.
Step 4- Connect HomePod to the Desired Wi-Fi Network
Once you have the MAC address, you can connect it to a new Wi-Fi network of your choice by entering it.
After doing so, remove the HomePod from the Home app and manually reset it. Once it finishes resetting, pair it with the network of your choice.
What to Do When HomePod Shows A Problem with the Wi-Fi Network?
If the HomePod is not connected to an internet connection, then it will be unable to function properly. When you give Siri a command, it will say, “There is a problem with the Wi-Fi network.”
This error usually occurs when you have switched locations and are trying to set up your HomePod with a new Wi-Fi network.
If your HomePod is showing the same error, you can check for alerts in the Home app. If there is a problem with the Wi-Fi, you will see “Wi-Fi Network” written in red on the HomePod device icon in the Home app.
- Open the Home app on your iPhone or iPad.
- Connect your iOS device to the new Wi-Fi network before trying to set up the HomePod.
- On the home app, select your HomePod device.
- Scroll down until you see a message saying your HomePod is connected to a different Wi-Fi network than your phone. It will prompt you to move the HomePod to the same network.
- Click on it to switch to the new network you connected your iOS device to.
What Causes Connectivity Issues in the HomePod?

The Apple HomePod has gotten stellar reviews for its performance, sound, and other features. But there is one problem that many users have reported, which is having problems with the Wi-Fi network.
There could be many reasons responsible for this error. Let us take a brief look at each of these:
1. Stable Internet Connection
The iOS device you have paired your HomePod with must have a stable and secure internet connection.
If your iPhone, iPad, or iPod is not connected to the internet, it will cause problems with the HomePod connection as well.
2. iOS Device and HomePod Connected to Different Networks
Make sure your HomePod and iOS device are connected to the same Wi-Fi. If you have changed the Wi-Fi password or switched to a new ISP altogether, you need to connect your HomePod to the same as well.
To do so, you have to reset it. You can either reset it manually or follow these steps to reset it via the Home app:
- Open the Home app on your phone and select HomePod.
- Scroll to the bottom of the page and click “Reset HomePod.”
- Select “Restart HomePod” when prompted and let it auto-reset.
Once it is done, try connecting the HomePod to the new Wi-Fi.
3. Update HomePod and iOS Software
You must check the home app regularly for any HomePod updates. Similarly, you need to update your iPhone and iPad whenever a new software update is released.
You can check on the home app for any HomePod updates. And for the iOS updates, you can check them in general settings under software updates.
People Also Ask
In this section, you will find the answers to some of the most frequently asked questions about the Apple HomePod.
1. Is Apple Discontinuing the HomePod?
Yes, Apple has decided to discontinue the popular smart speaker device four years after its release. On March 12, 2021, Apple announced that they were taking the original HomePod off the market and would instead focus on its smaller version, the HomePod Mini, which was released in November 2020.
Although the original speakers are being discontinued, Apple will still carry on with HomePod support for the time being.
2. Can You Play Music on the HomePod Without A Wi-Fi Network?
You cannot access Siri integration without the internet, but you can listen to music via Airplay. You can make this happen by making some changes to the HomePod settings.
Open the Home app and click on the house icon in the upper left corner. Select your HomePod and scroll down to “Speaker Access.” Give access to everyone, but you should keep a password to be safe. Once you are done configuring the HomePod, you can play the music through your connected iOS device via Apple Airplay.
3. How to Set Up the HomePod Using An iOS Device?
Setting up the HomePod with any iOS device is the easiest thing ever. Let us say you are using an iPhone. Keep your phone close to the HomePod device and switch it on. In a few moments, you will see a “Set Up” prompt pop up on your screen.
After this, you have to follow the onscreen instructions to finish the setup. Choose where the HomePod will be, permit reading of personal information (or not), and transfer the accounts and phone settings. Enter your Apple ID password, and the setup is complete. Yes, it’s that simple!
Conclusion
If you made it to the end, then by now, you know all the ways you can solve every Wi-Fi network issue on the Apple HomePod.
And if you cannot get the HomePod to work even after trying out all these methods, it might be a bug that Apple will fix in a new software update.
You can also contact Apple HomePod support to register your queries about HomePod Wi-Fi issues and ask for a solution.


