The Blink camera has emerged as one of the most popular choices for modern home security. The key to maximizing its potential is keeping it connected to your WiFi network. This connection allows remote monitoring and real-time access to your home’s surveillance feed. So, in this blog post, we’ll show you how to connect a blink camera to WiFi.
Whether you’re a tech novice or a seasoned enthusiast, this setup is essential to keeping your home and family safe. Let’s get started.
How to Connect Blink Camera to WiFi

Here is a step-by-step guide that shows you how to connect your blink camera to WiFi.
No products found.
Preparing for Setup
It’s essential to have everything in place before you start the setup process. Prepare your Blink camera for WiFi by following these steps:
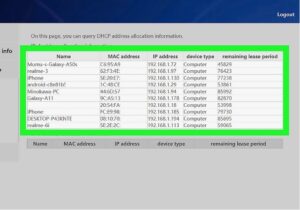
- Stable WiFi Network: Ensure your home WiFi network is stable and functioning correctly. The Blink app and camera must have a reliable connection to communicate uninterruptedly.
- Compatible Device: Ensure your smartphone or tablet is compatible with the Blink app. You can find this information on the app’s download page in the App Store (for iOS users) or Google Play Store (for Android users). Also, check that your device meets the minimum requirements for running Blink.
- Camera Power: Charge your battery-operated Blink cameras before starting setup. If you use the Blink XT or Blink XT2 cameras, ensure they are plugged into a power source for continuous operation.
Install the Blink App
Install the Blink app on your smartphone or tablet to set up your camera. Here’s how you do it:
- Launch the App Store (for iOS users) or Google Play Store (for Android users) on your device.
- In the search bar, type “Blink” and press enter. Find the official Blink app developed by Immedia Semiconductor.
- Please tap on the Blink app icon to open its download page. Click “Download” or “Install” to begin the installation process. Automatically, the app will be downloaded and installed on your device.
- Once the app is installed, please open it and follow the on-screen instructions to create a Blink account. You must enter your email address, create a password, and complete the account setup process.
- After creating an account, log in to the Blink app using your credentials. If you already have a Blink account, enter your email address and password to sign in.
Set Up Your Blink Camera
Having installed the Blink app and created your account, you can set up your Blink camera and connect it to WiFi. Here’s how to set it up:
Power on the Blink Camera
If your Blink camera is battery-powered, put the batteries in and press the power button. For Blink XT or Blink XT2 cameras, ensure they are plugged into a power source.
Launch the Blink App
Open the Blink app on your smartphone or tablet. Enter your email address and password to log into your Blink account.
Add Device
Once logged in, navigate to the app’s home screen and tap the “Add Device” button. Follow the on-screen instructions to proceed.
Scan the QR Code or Enter the Serial Number
The app will ask you to scan the QR code on the back of your Blink camera or enter the serial number manually. For scanning, make sure the camera is within range of your smartphone or tablet.
Connect to WiFi
The app will guide you through connecting your Blink camera to your WiFi network once you scan the QR code or enter the serial number. Select your WiFi network from the list of available networks and enter the password when prompted.
Complete Setup
After entering the WiFi network details, follow any additional on-screen instructions to complete the setup. Once your Blink camera is connected to WiFi, the app will confirm it.
Placement
After setup is complete, choose an optimal location for your Blink camera. Ensure the camera has a clear view of the area you want to monitor, and adjust the angle if necessary.
Test the Camera
Using the Blink app, test your camera’s live view and motion detection features to ensure they work. You can also adjust camera settings like motion sensitivity and recording length.
With these steps, you’ll set up your Blink camera and establish a secure connection to your WiFi network so you can monitor your home remotely.
Troubleshooting Tips For Blink Camera Setup
When setting up your Blink camera, you might run into some common problems. You can overcome potential obstacles by following these troubleshooting tips:
Weak WiFi Signal
If your Blink camera has trouble connecting to your WiFi network, ensure it is within range of your router. Move the camera closer to the router or install a WiFi range extender for better signal strength.
Incorrect WiFi Password
During the setup process, double-check that you entered the correct WiFi password. Make sure to enter uppercase and lowercase letters correctly when entering WiFi passwords.
Camera Not Detected
If the Blink app cannot detect your camera during setup, try power cycling the camera by turning it off and on again. Ensure the camera is set up and the QR code or serial number is entered correctly.
Router Compatibility Issues
Some routers may have compatibility issues with Blink cameras. You must ensure that your router is compatible with the 2.4GHz WiFi frequency, as Blink cameras support this frequency.
Firmware Updates
Check if there are any firmware updates available for your Blink camera. Updating the firmware can resolve compatibility issues and improve camera performance. You can check for updates within the Blink app’s settings menu.
Resetting the Camera
You can reset your Blink camera to factory settings if everything else fails. It allows you to start the configuration process from scratch after erasing existing settings. You can reset your camera by following the instructions in its user manual.
These troubleshooting tips will help you resolve common setup issues and ensure that your Blink camera connects smoothly to your WiFi network. If you continue to have problems, you can contact Blink customer support.
FAQs
Why won’t my Blink camera connect to my WiFi extender?
There are several reasons why your Blink camera won’t connect to your WiFi extender. Such as:
- Incompatible Frequency Bands: Ensure your WiFi extender supports 2.4GHz, which is required for Blink cameras. Blink cameras aren’t compatible with extenders operating on the 5GHz band.
- Signal Strength: Ensure your WiFi extender is within range of your Blink camera. Strong signal strength can help connectivity. Move the extender closer to the camera or adjust its position for better coverage.
- Configuration Mismatch: Ensure your WiFi extender has the same network name (SSID) and password as your main router. The Blink camera should seamlessly switch between the router and the extender. Consistent configuration settings may need fixing.
- Interference: Check for wireless interference near your Blink camera or WiFi extender. Electronic devices, thick walls, and other wireless networks can disrupt signals.
- Device Compatibility: Not all WiFi extenders are compatible with Blink cameras. Make sure your extender is compatible with the Blink camera model you’re using.
- Firmware Issues: Check your Blink camera and WiFi extender for firmware updates. Outdated firmware can cause compatibility issues and connectivity problems.
Why is my Blink camera not working?
There are several reasons why your Blink camera may not be working. First, ensure it has sufficient power; replace batteries or check the connection if it’s a wired camera. Ensure WiFi connectivity is stable and the camera is placed within range of the WiFi network. Ensure the Sync Module or Bridge is connected and powered on.
Verify that motion detection is enabled in the Blink app and that settings are configured correctly. Check for firmware updates and apply them if available. Take into account environmental factors such as extreme temperatures or obstructions. Inspect the camera for physical damage. Restart the camera, Sync Module/Bridge, and WiFi router if issues persist.
How do I update my Blink app?
It’s easy to update your Blink app. Go to the App Store (for iOS) or Google Play Store (for Android), search for “Blink,” and tap “Update” if available. You can also enable automatic updates in your device settings. After updating, restart the app to ensure the changes take effect.
Updating your Blink app ensures access to the latest features and security patches. Ensure you have a stable internet connection, and contact Blink customer support if you encounter any problems.
How do I reset my Blink WiFi camera?
Resetting your Blink WiFi camera is straightforward. The reset button is typically a small pinhole on the camera or Sync Module/Bridge. Hold the reset button for 10-15 seconds until the LED indicator flashes blue and turns solid amber. Once the solid amber light appears, release the button.
Reconnect the camera using the Blink app after resetting it. The app will prompt you to connect the camera to your WiFi network and set it up. This simple process fixes a lot of issues and resets your Blink camera to its default settings.
The Takeaway
Connecting your Blink camera to WiFi can enhance your home security setup. This blog post’s step-by-step guide will help you seamlessly integrate your Blink camera into your WiFi network. Using the Blink app, you can now monitor your home remotely and access it in real-time. Explore additional features and accessories to customize your home security system with Blink cameras.